Disclosure: This post contains affiliate links. If you buy through them, I may earn a small commission at no extra cost to you. I only recommend products I’d genuinely put in my own space.
You bought new cabinet pulls. They looked exactly right on the product page — the right finish, the right weight, the right vibe for a kitchen you’d actually want to cook in. You installed them on a Saturday afternoon, stepped back, and somehow the kitchen looked more rental than it did before.
This is the apartment kitchen cabinet upgrade version of a problem most decorating advice never names: finish language. Cabinet hardware, backsplash tile, contact paper on the fronts, and even the bulb under the cabinet are all speaking at the same time — and if they’re speaking in three different finish dialects, no individual product is going to rescue the room. The brass looks wrong next to the cool grey tile. The warm wood grain fights with the matte black pulls. Each piece is technically fine. Together, they read as a rental where someone tried a few things.
These six apartment kitchen cabinet ideas are ordered by impact — start here, do this in this sequence, and the last one lands because the first five set it up. The one thing that runs through all of them is a finish pairing system that makes everything you spend money on agree with each other. That’s what turns three separate upgrades into a kitchen that looks like someone made a decision.
THE 6 APARTMENT KITCHEN CABINET IDEAS
✓ Idea 1 — Under-cabinet light: Start here — it changes how everything else reads
✓ Idea 2 — The hardware swap: Measure first, then order
✓ Idea 3 — The finish pairing system: The one rule that connects every upgrade
✓ Idea 4 — Contact paper: Kitchen-specific rules before you open the roll
✓ Idea 5 — Take two doors off: Costs nothing, changes the most
✓ Idea 6 — The top-of-cabinet layer: Three objects, one living thing
1. Start Under the Cabinets, Not On Them

Most people start with hardware or backsplash — the visible changes. The under-cabinet light gets treated as an afterthought, the thing you add after everything else is done. That order is backward.
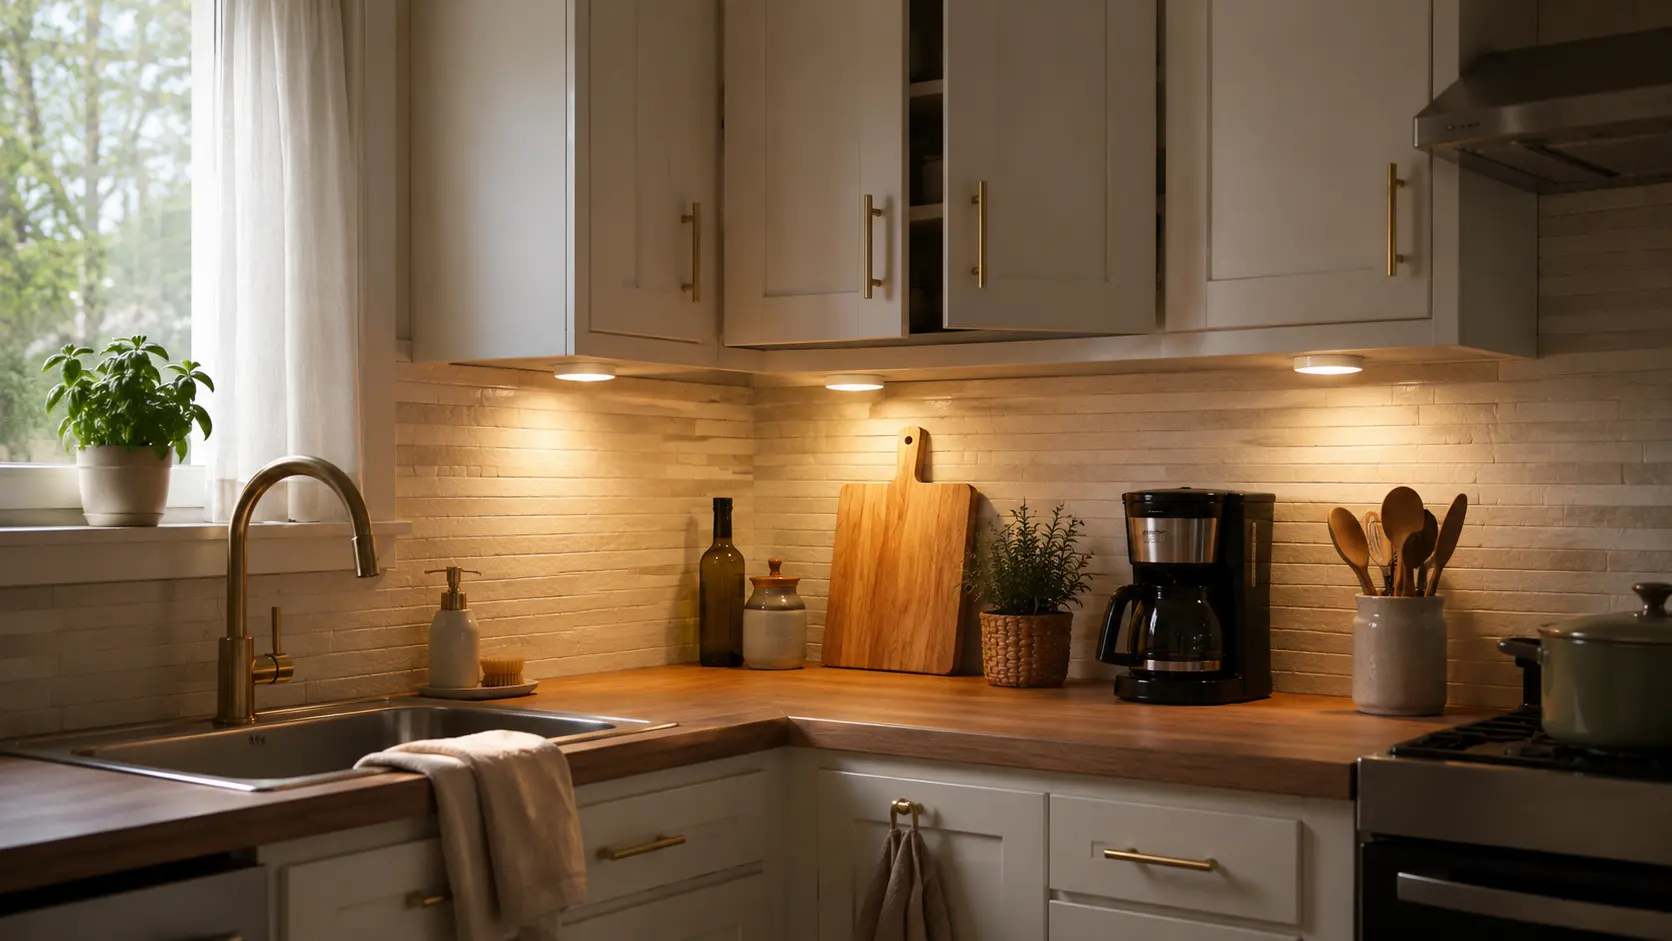
Light quality determines how every other upgrade reads. New brass pulls in flat, cold overhead fluorescent light look cheap. Those same brass pulls under a warm 3000K glow look like a decision. The under-cabinet light isn’t a finishing touch — it’s the context that everything else sits in. Install it first, and you’ll be able to see what your next move actually needs to be. Skip it, and you’ll spend money on upgrades that look half-formed because the lighting is flattening them.
The EZVALO 6-Pack puck lights are rechargeable — no wiring, no drill, magnetic mount with an adhesive plate. They come with three color temperatures: stick to the 3000K warm setting for a rental kitchen. Position them toward the front of the cabinet’s underside so the beam hits the backsplash zone, not just the countertop. That’s where the light reads from across the room.
2. The Hardware Swap — But Measure First

For apartment kitchen cabinets, hardware is the single highest daily-touchpoint upgrade you can make. You open your cabinets every time you reach for a mug, a pan, a glass. The feel of a good pull, every single time, is something cheap builder hardware never gives you — and it’s one of the few upgrades in a rental where you can take it with you when you leave.
The single rule before you order anything: measure your existing hole spacing. Cabinet pulls mount on two screws set a specific distance apart, called center-to-center (CC). The most common rental kitchen spacing is 3 inches (76mm). Some older kitchens run 3-3/4 or 4 inches. Order the wrong CC and you’re drilling new holes, which in most leases requires permission you may not have.
The 3-Measurement Hole Spacing Check — take all three before you open a product page:
- Center-to-center distance — measure between the two existing screw holes on one of your current pulls. This is your CC number. Write it down.
- Pull length clearance — for a 5-inch pull on a 3-inch CC, confirm the extra length on each end clears the edge of your drawer or door without overhanging awkwardly.
- Screw depth — most replacement pulls include screws; confirm the depth works with your door thickness (most rental cabinet doors are 3/4 inch).
The JOY DECOR brass pulls run 3-inch CC standard — the size for most apartment kitchens — and come 30 to a pack, which covers most standard kitchen layouts. The same brand makes an identical pull in matte black at the same hole spacing, which matters for the finish system in the next section.
3. The Finish Pairing System — The Most Important of These Apartment Kitchen Cabinet Ideas
Here’s the thing nobody tells you about apartment kitchen cabinet upgrades: three individually correct products can make your kitchen look worse than any one of them alone. Not because the products are wrong. Because finish language is a system, and you’ve been buying it piece by piece.
💡 The finish language rule. Every metal finish, every tile style, and every surface material has an undertone — warm, cool, or neutral. When those undertones match across everything in the cabinet zone, upgrades look designed. When they fight, the kitchen reads as a collection of attempts. Brass hardware with a cool grey backsplash and warm wood contact paper are three separate conversations happening in the same room.
The fix is choosing one of three combinations before you buy anything — and staying inside it.
WARM — for cream, white, or light wood cabinets. Brushed brass hardware paired with a beige or warm-toned tile backsplash. Everything in this combination carries a golden or honey undertone. The JOY DECOR brass pulls and the STICKGOO beige and white backsplash tile are built for each other — same warmth, same quiet elegance.
COOL — for white, grey, or dark espresso cabinets. Matte black hardware with a cool grey or crisp white subway tile. Nothing warm in this combination — no gold, no beige undertones. The JOY DECOR matte black pulls anchor this combination cleanly.
NEUTRAL — works with almost any cabinet color. Brushed nickel or champagne bronze hardware with classic white subway tile. This is the most forgiving combination if you’re starting from scratch and aren’t sure which direction your kitchen wants to go. It doesn’t commit to warm or cool — which means it doesn’t fight with anything either.
Three individually correct cabinet upgrades can look worse together than any one alone — not because the products are wrong, but because finish language is a system, not a shopping list.
The rule that runs through all three: pick one combination, then buy everything — hardware, tile, contact paper — within it. The breakdown isn’t product quality. It’s mixing a warm hardware finish with a cool tile because you liked both of them separately. Once you have your combination locked, the order in which you install each piece matters too — the complete sequencing is in this guide to tackling your rental kitchen upgrades in the right order.

4. Contact Paper Your Apartment Kitchen Cabinet Fronts (Kitchen Rules)
Contact paper works on rental cabinet fronts. It also fails more often in kitchens than anywhere else in an apartment — because most instructions are written for bedroom furniture, not for surfaces that live next to a stove and a sink every day.
Three things to get right before you start:
Clean the doors with a degreaser first. Not a quick wipe — actual degreaser spray, fully dried. Kitchen cabinet fronts have years of invisible cooking oil on them, and contact paper won’t bond to oil. This is why most bubbling and peeling happens, and it has nothing to do with the product quality.
Apply to flat slab doors only. Raised-panel cabinet doors have edge detail that traps air and peels from the corners within weeks. Flat fronts — which most rental kitchens have — are what contact paper was designed for. If your cabinets have raised panels, skip the fronts and use contact paper inside the shelves instead.
Leave the cabinet directly above the stove untreated. The concentrated heat and steam above a burner is too much for standard vinyl. Apply to every other front, and let the hardware and light carry that one door. Nobody notices the exception — they notice the whole room.
The COSNIGHT wood grain contact paper is a warm brown tone that reads as light oak from normal viewing distance. Applied cleanly on flat fronts, it shifts builder-grade cabinet doors from “clearly rental” to “might have actually been a choice.” The adhesive releases cleanly if you remove it with a hair dryer — heat softens the backing and it peels without residue.

5. Take Two Doors Off
Of all the apartment kitchen cabinet ideas on this list, this is the one that costs nothing and changes the kitchen the most per square inch.
Remove two or three adjacent upper cabinet doors — ideally from a section that doesn’t have your everyday chaos storage behind it. Leave what’s inside exactly as it was, then style that open section: two or three of your everyday dishes toward the front, a small ceramic vessel on one shelf, space between everything. You’re not decorating. You’re editing.
The reason this works: a fully closed cabinet run reads as a landlord’s kitchen. Every door is the same surface, the same texture, the same beige. One open section interrupts the uniformity, draws the eye, and tells you something about the person who lives there. It transforms a row of identical boxes into a kitchen that looks like it was arranged. Before you do this, make sure the inside of that cabinet is worth showing — if the shelf itself is cluttered, a system for the inside of your cabinets is the first step.
One rule for what’s visible on the open shelf: consistent tones. All white and cream dishes, or all earthy terracotta tones, or all-dark. Not white plates next to a turquoise mug next to a red thermos. The cohesion of that shelf is the whole point of opening it.
6. The Top-of-Cabinet Layer
If there’s a gap between your upper cabinets and the ceiling, leaving it empty is a choice that reads as unfinished. It’s also the simplest move on this list.
Three objects, maximum. Vary the heights. At least one of them is alive or organic — a trailing pothos, a small dried botanical, a woven piece. The other two can be a wooden bowl and a stacked pair of cookbooks. That’s the whole formula.
The pothos is the right call for a kitchen specifically. It tolerates the heat and humidity better than most plants, grows quickly, and the trailing stem that falls down over the cabinet front is what gives this space its softness. A small trailing plant above the cabinets does more for the overall feel of a rental kitchen than most things you’d spend real money on — and it costs less than a single cabinet pull.

Your rental kitchen didn’t feel like yours because the products were wrong. It felt like a rental because nothing you put in it was having the same conversation. Start with the light this weekend — everything else will read differently once it’s in.
Shop This Cozy Kitchen Upgrade
Start with the EZVALO lights — they change how every other upgrade reads before you spend anything else. From there, the hardware is the highest daily-touchpoint investment in the room. Brushed brass for a warm combination, matte black for a cool one — both from the same brand at the same hole spacing so the installation is identical.
EZVALO
Under Cabinet
Lights
Six rechargeable puck lights, no wiring, no drill — magnetic mount with adhesive plates. Three color temperatures; use the 3000K warm setting. Install these before anything else and the whole counter zone changes.
JOY DECOR
Brass
Pulls
Brushed brass, 3-inch center-to-center, 30-pack. Stainless steel construction with a warm brass finish. Pairs with beige or warm-toned backsplash tile. Measure your existing hole spacing before ordering — most apartment kitchens are 3-inch CC.
JOY DECOR
Matte Black
Pulls
Same brand, same 3-inch center-to-center, same 30-pack — matte black finish for the cool finish combination. Pairs with cool grey or crisp white subway tile. If you’re choosing between this and the brass version, see the Finish Pairing System section above.
COSNIGHT
Wood Grain
Contact Paper
Warm brown wood grain, 15.7″ × 118″ roll — enough for most standard upper cabinet sections. Degrease the door fronts before applying. Flat slab cabinet doors only. Peels cleanly with heat. Warm enough to sit inside the warm finish combination.
STICKGOO
Peel-and-Stick
Tile
Beige and white, 12″×12″, 10-sheet pack — waterproof vinyl at 2.5mm thickness. Peel, interlock, and stick. No grout. Designed specifically for the warm finish combination: pairs naturally with brass hardware and warm-toned wood grain surfaces.
Leave a Reply